


The Bold BI® Embed SDK is a native client-side JavaScript component that helps you embed dashboards in your web applications. You just need to add a script along with a Bold BI instance to integrate the dashboards into your applications in a secure manner.
Using Bold BI, you can quickly embed dashboards created per your business requirements and avoid building an analytics or BI solution yourself, saving development time.
The Bold BI Embed SDK has various features and customizations, which you can see in our sample browser.
In this blog post, I’ll discuss in detail how to integrate dashboards with the embed SDK into ASP.NET MVC and ASP.NET Core applications.
Prerequisites
Before integrating the dashboards into any web application, do the following:
- Prepare the enterprise-grade dashboard.
- Once the dashboard is ready, generate an embed secret from the Bold BI server.
- In the embedding application, implement the authorization server that will be authorized by the Bold BI server to allow the application to embed the dashboards.
Let’s discuss, step by step, how to implement these requirements and embed the dashboards in ASP.NET MVC and ASP.NET Core applications.
Integrating dashboards into ASP.NET MVC applications
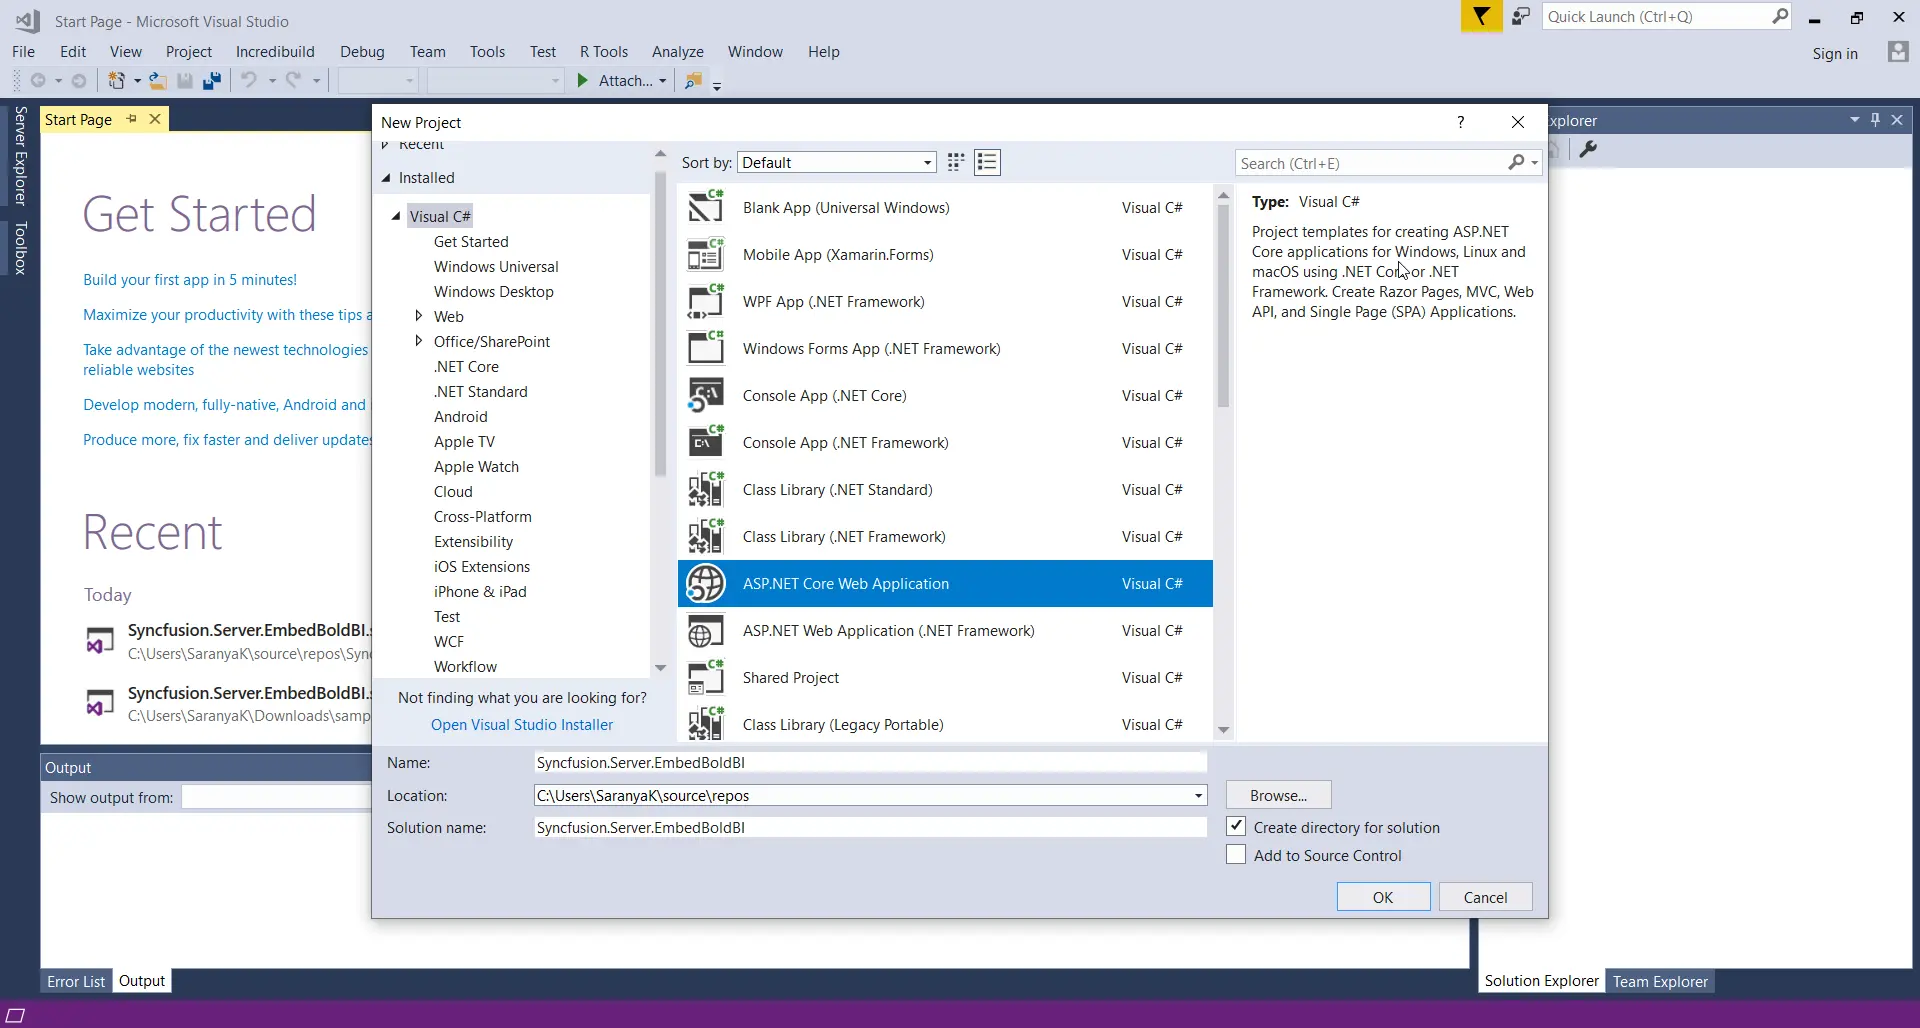
- Using Microsoft Visual Studio, create a new ASP.NET MVC project (File > New > Project), as shown.
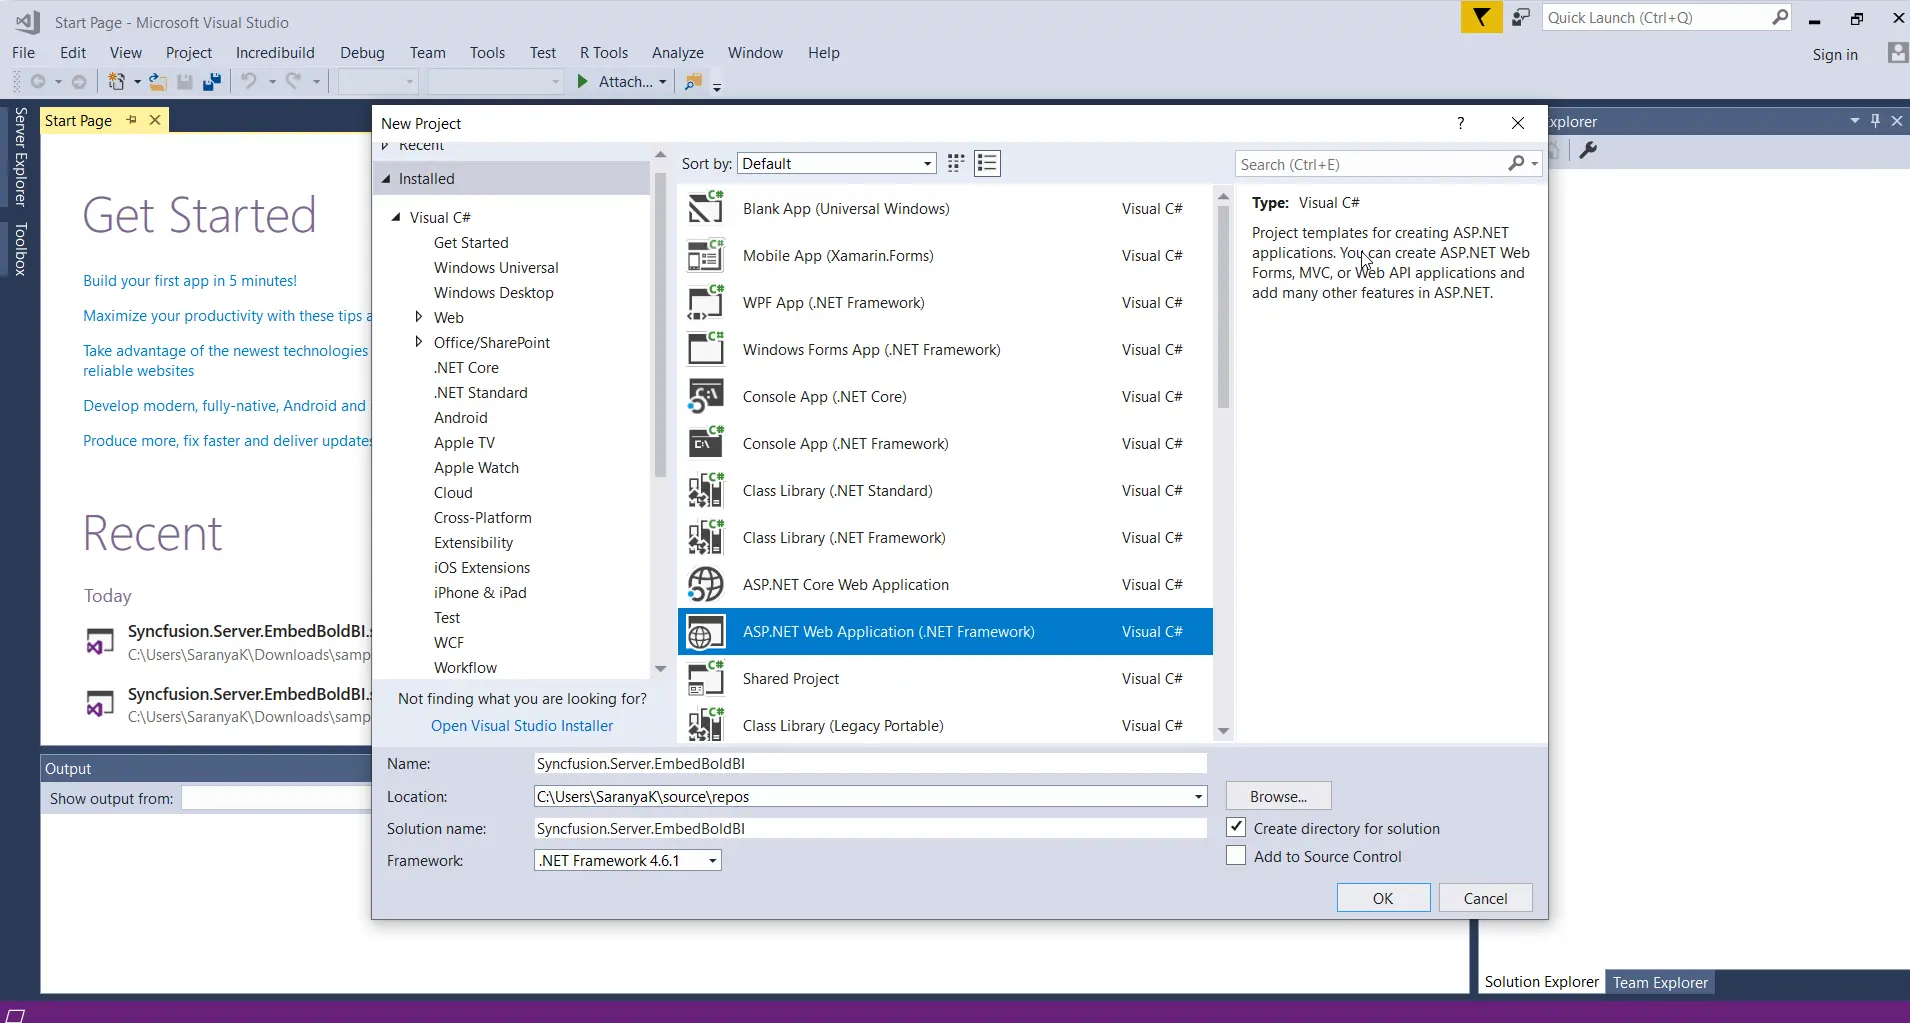
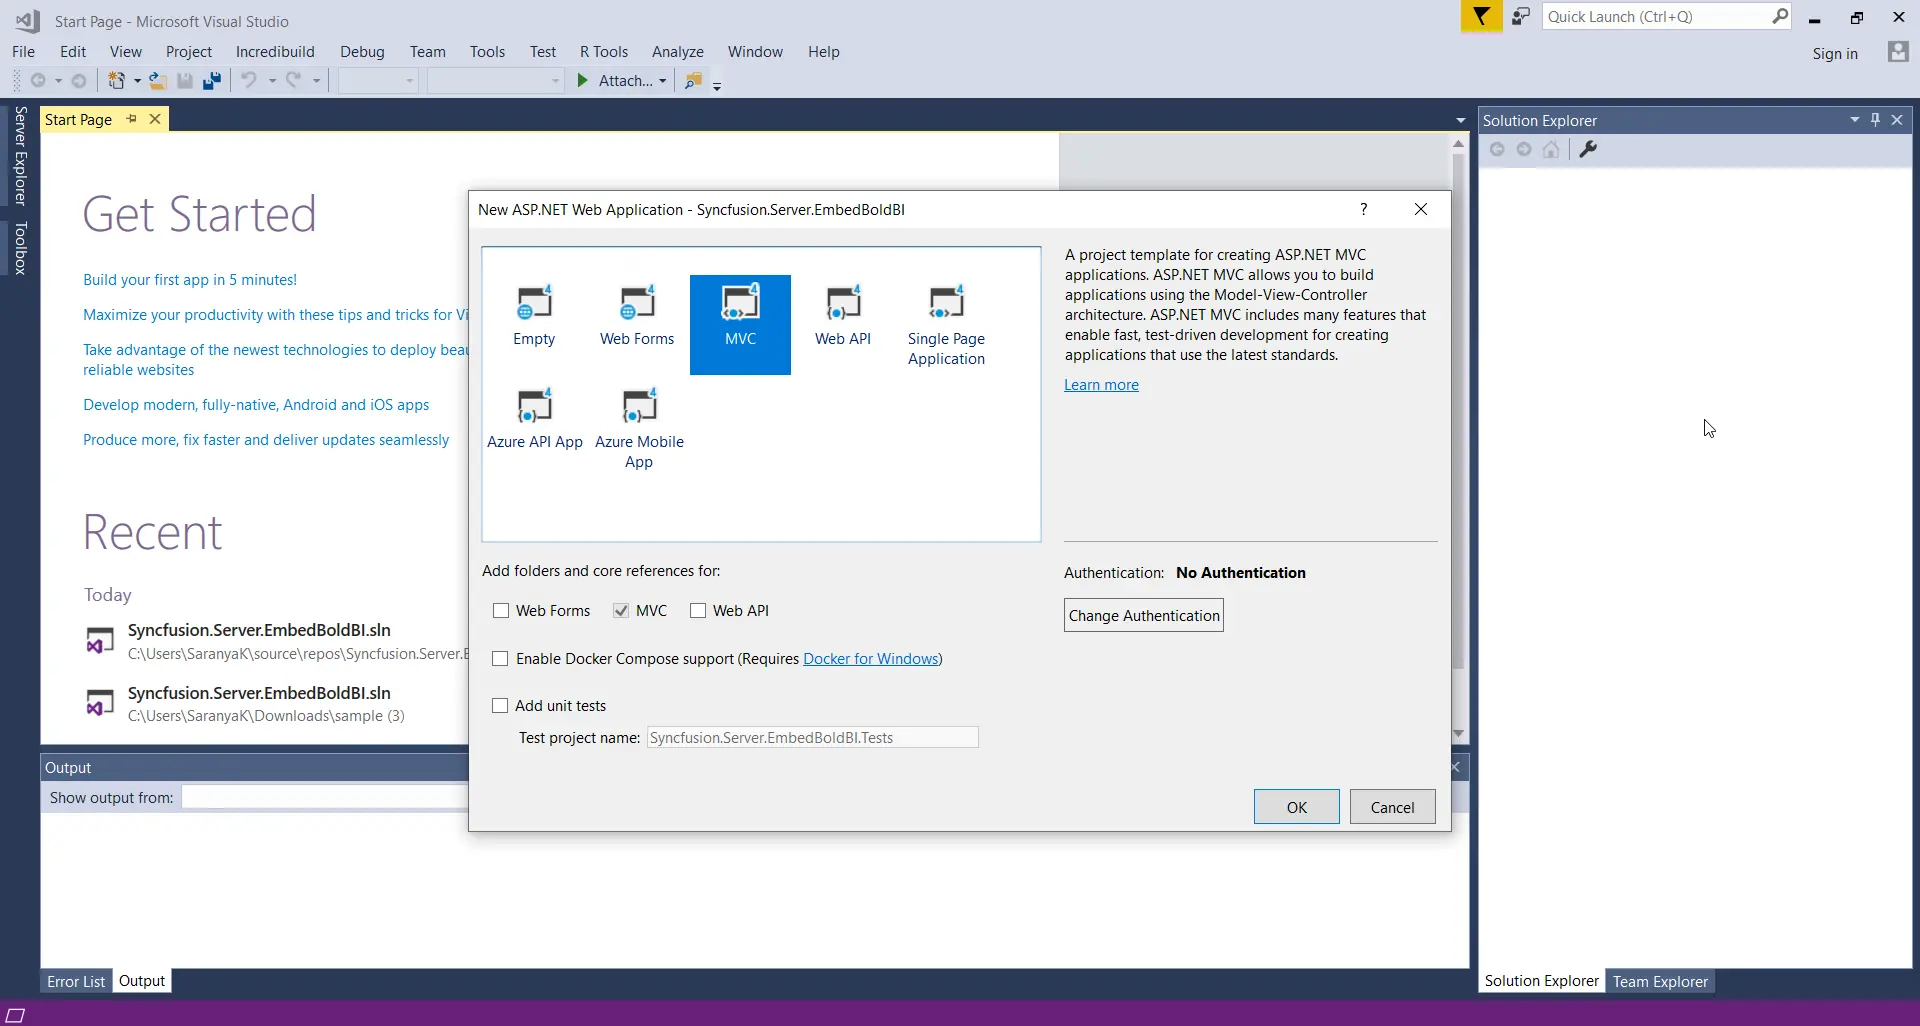
Create New ASP.NET Web Application Choose the MVC template from the Project Template window, as shown.

Choose MVC template from Project Template Window - Create a Model class called EmbedProperties under Models and provide the dashboard RootUrl, SiteIdentifier, Environment, UserEmail, and EmbedSecret.
using System;
using System.Collections.Generic;
using System.Linq;
using System.Web;
namespace Syncfusion.Server.EmbedBoldBI.Models
{
public class EmbedProperties
{
public static string RootUrl = "http://localhost:5000/bi/";
public static string SiteIdentifier = "site/site1";
//Enter your BoldBI credentials here.
public static string UserEmail = "Your User Email";
// Get the embedSecret key from Bold BI.
public static string EmbedSecret = "Your Embed Secret";
}
}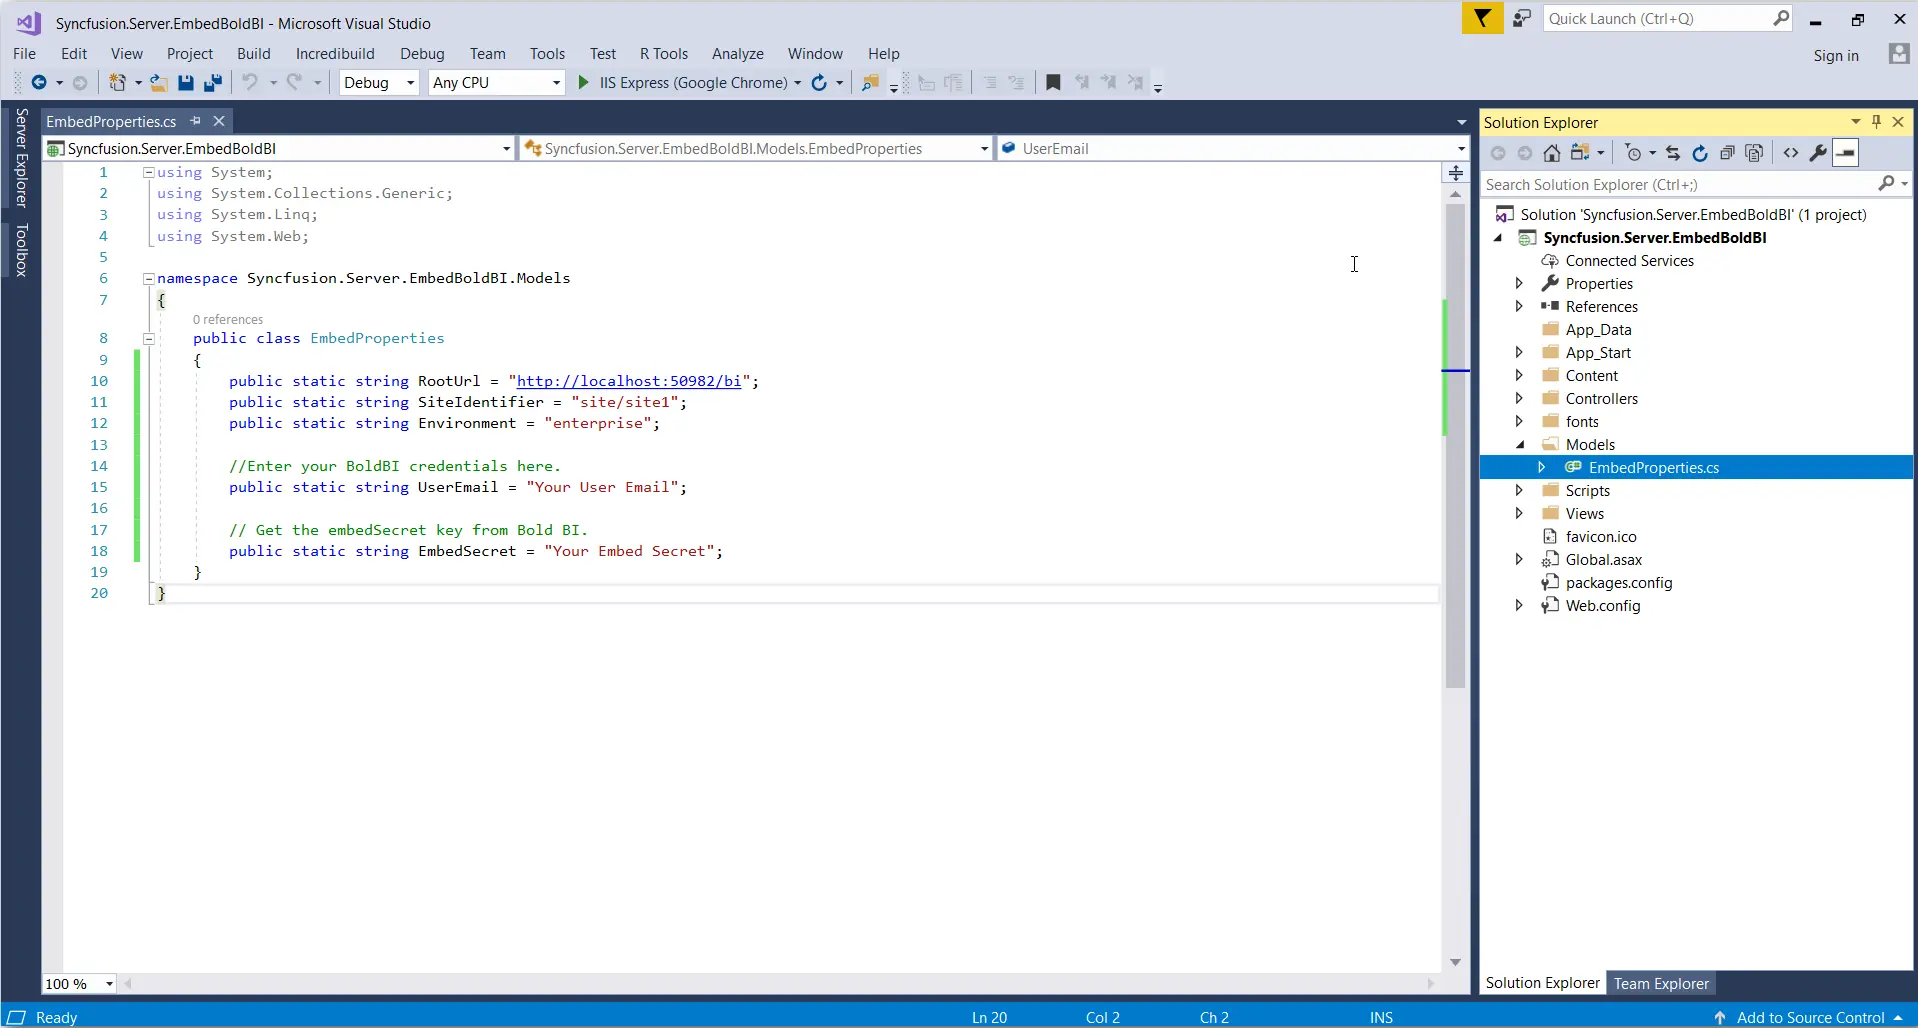

Create EmbedProperties Class in Model RootUrl Dashboard server BI URL. For example: https://localhost:5000/bi, https://dashboard.syncfusion.com/bi. SiteIdentifier - For Bold BI Enterprise edition, it should be something like “site/site1”.
- For Bold BI Cloud edition, it should be an empty string.
Environment Bold BI application environment. - For cloud BI, you can use “cloud”.
- For Enterprise BI, you should use “enterprise”.
UserEmail Bold BI server will use an email to authorize the authorization server. EmbedSecret Generate the EmbedSecret. - Add code to create the authorization server in the HomeController by sending a user email and embed signature to the Bold BI server for validating the embed details, as shown.
[HttpPost]
        [Route("AuthorizationServer")]
        public string AuthorizationServer([FromBody] object embedQuerString)
        {
            var embedClass = Newtonsoft.Json.JsonConvert.DeserializeObject(embedQuerString.ToString());

            var embedQuery = embedClass.embedQuerString;
            // User your user-email as embed_user_email
            embedQuery += "&embed_user_email=" + GlobalAppSettings.EmbedDetails.UserEmail;
			//To set embed_server_timestamp to overcome the EmbedCodeValidation failing while different timezone using at client application.
            double timeStamp = (int)DateTime.UtcNow.Subtract(new DateTime(1970, 1, 1)).TotalSeconds;
            embedQuery += "&embed_server_timestamp=" + timeStamp;
            var embedDetailsUrl = "/embed/authorize?" + embedQuery + "&embed_signature=" + GetSignatureUrl(embedQuery);

            using (var client = new HttpClient())
            {
                client.BaseAddress = new Uri(embedClass.dashboardServerApiUrl);
                client.DefaultRequestHeaders.Accept.Clear();

                var result = client.GetAsync(embedClass.dashboardServerApiUrl + embedDetailsUrl).Result;
                string resultContent = result.Content.ReadAsStringAsync().Result;
                return resultContent;
            }

        }

        public string GetSignatureUrl(string queryString)
        {
            if (queryString != null)
            {
                var encoding = new System.Text.UTF8Encoding();
                var keyBytes = encoding.GetBytes(GlobalAppSettings.EmbedDetails.EmbedSecret);
                var messageBytes = encoding.GetBytes(queryString);
                using (var hmacsha1 = new HMACSHA256(keyBytes))
                {
                    var hashMessage = hmacsha1.ComputeHash(messageBytes);
                    return Convert.ToBase64String(hashMessage);
                }
            }
            return string.Empty;
        }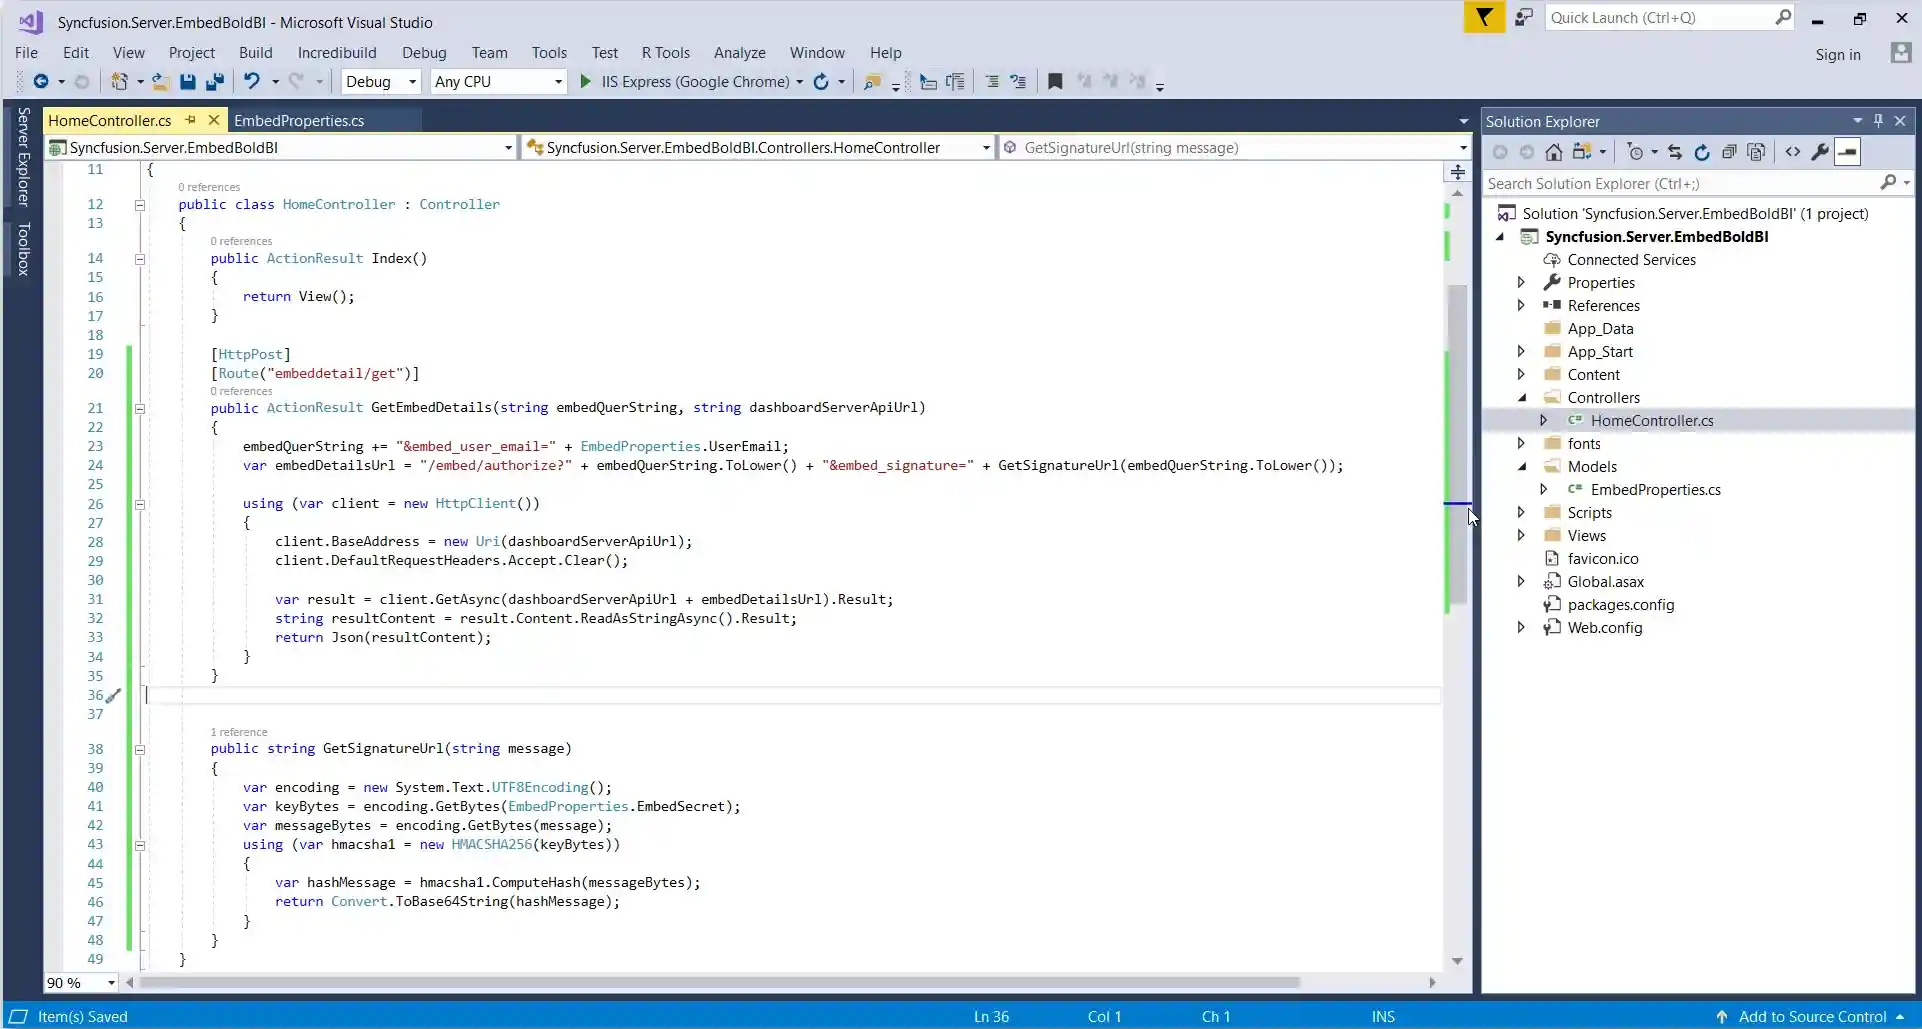

Add Code to Create The Authorization Server in Bold BI - Create an Index.js file under the Scripts folder and add the renderDashboard function to define the Bold BI instance to load the dashboard. EmbedProperties.cs is already defined under the Models folder. You can retrieve dashboardId via the dashboard URL. In the following URL example, the bolded text indicates the dashboard ID:
https://localhost:50982/bi/en-us/site/site1/dashboards/e89891d5-af12-4c8b-99c0-887b0ce122eb/Finance/Financial%20Management?showmydashboards=1
Finally, embedContainerID is set as dashboard, which is declared in HTML in a <div> tag.
function renderDashboard() {
    this.dashboard = BoldBI.create((
    serverUrl = rootUrl + “/” + siteIdentifier,
    dashboardId: “015e1ce3-2a6a-4fac-ab1e-59b3243d565a”,
    embedContainderId: “dashboard”,
    width: “100%”,
    height: “100%”,
    authorizationServer: {
    url: authorizationServerUrl
    },
    });
    console.log(this.dashboard);
    this.dashboard.loadDashboard();
}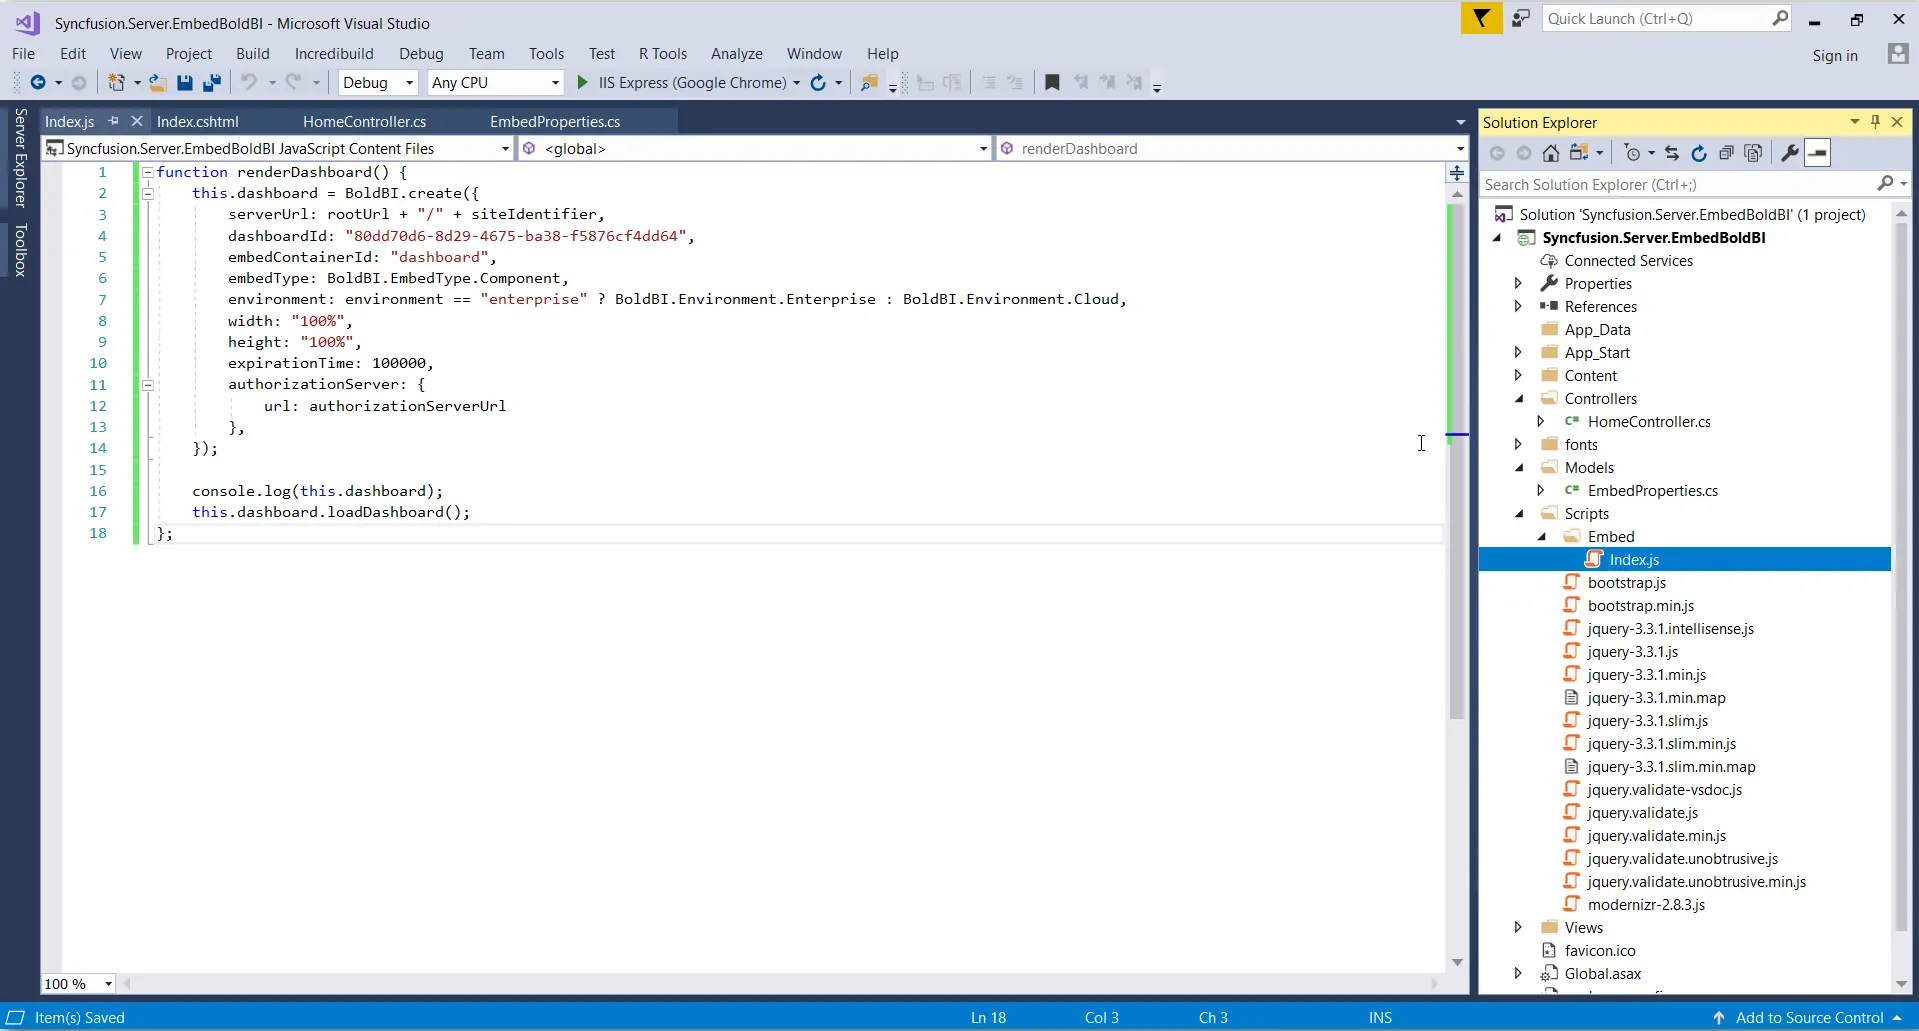

Create Index.js File and Define Bold BI Embedding Instance Note: Instead of the dashboardId property, you can use dashboardPath to create the Bold BI instance. The value should be in the format /{Category}/{DashboardName}.
- Create an Index.cshtml file under Views and refer to the required scripts. Create body content with embedContainerId as dashboard.
@using Syncfusion.Server.EmbedBoldBI.Models;
@{
viewBag.title = “Home”;
Layout = null;
}
<!DOCTYPE html>
<html>
<head>
<link rel="stylesheet" href="https://fonts.googleapis.com/css?family=Roboto:400,700" />
<link rel="stylesheet" href="./assets/css/site.css" />
<script type="text/javascript" src="https://cdnjs.cloudflare.com/ajax/libs/jquery/1.10.2/jquery.min.js"></script>
<script type="text/javascript" src="https://cdnjs.cloudflare.com/ajax/libs/jquery-easing/1.3/jquery.easing.min.js"></script>
<script type="text/javascript" src="https://cdnjs.cloudflare.com/ajax/libs/jsrender/1.0.5/jsrender.min.js></script>
<script type="text/javascript" src="https://cdn.boldbi.com/embedded-sdk/v3.3.40/embed-js.js"></script>
<script type="text/javascript" src="./Embed/Index.js”></script>
var rootUrl = “@EmbedProperties.RootUrl”;
var siteIdentifier = “@EmbedProperties.SiteIdentifier”;
var authorizationServerUrl= “@url.Action(“GetEmbedDetails”, “Home”)”;
</script>
</head>
<body onload="renderDashboard(dashboardId)" style=”width:100%; height: 100%”>
        <div id="dashboard" ></div>
</body>
</html>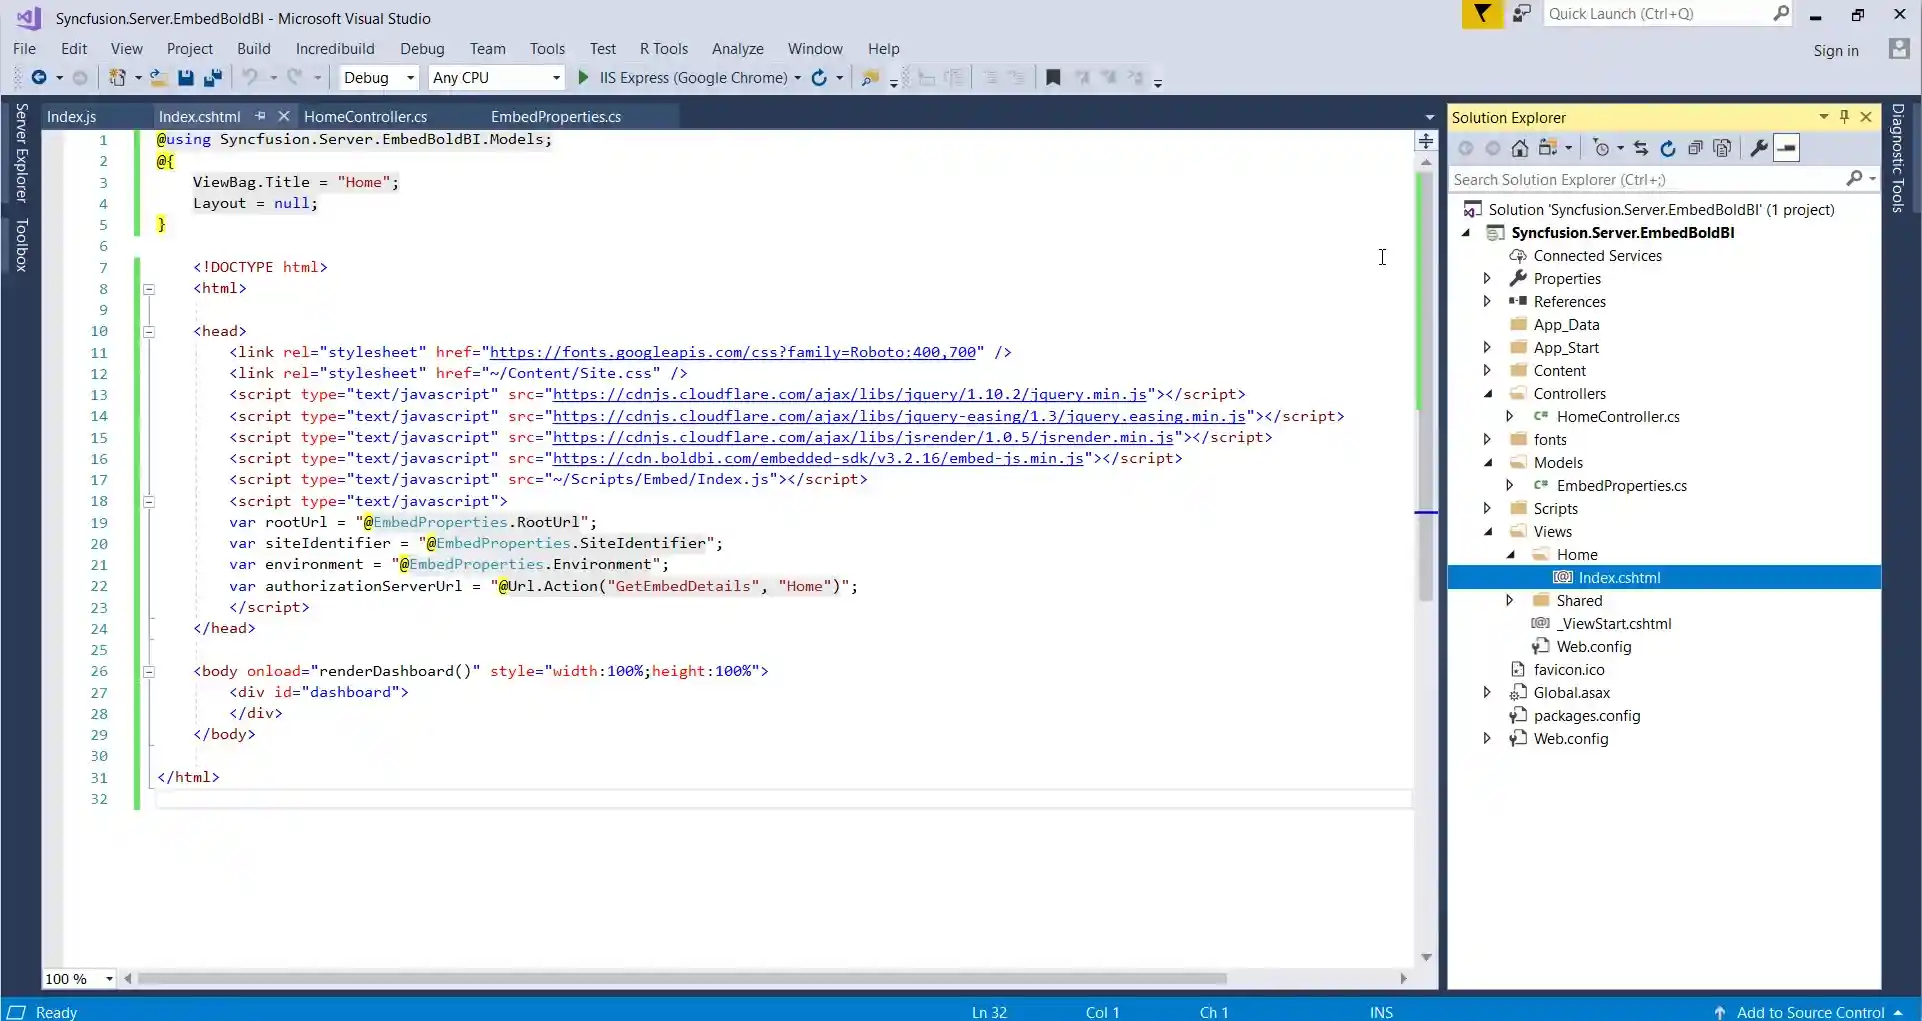

Create an Index.cshtml View file and Add HTML Code to Load the Dashboard - Finally, run the ASP.NET MVC application, and you’ll see that the dashboard is embedded.
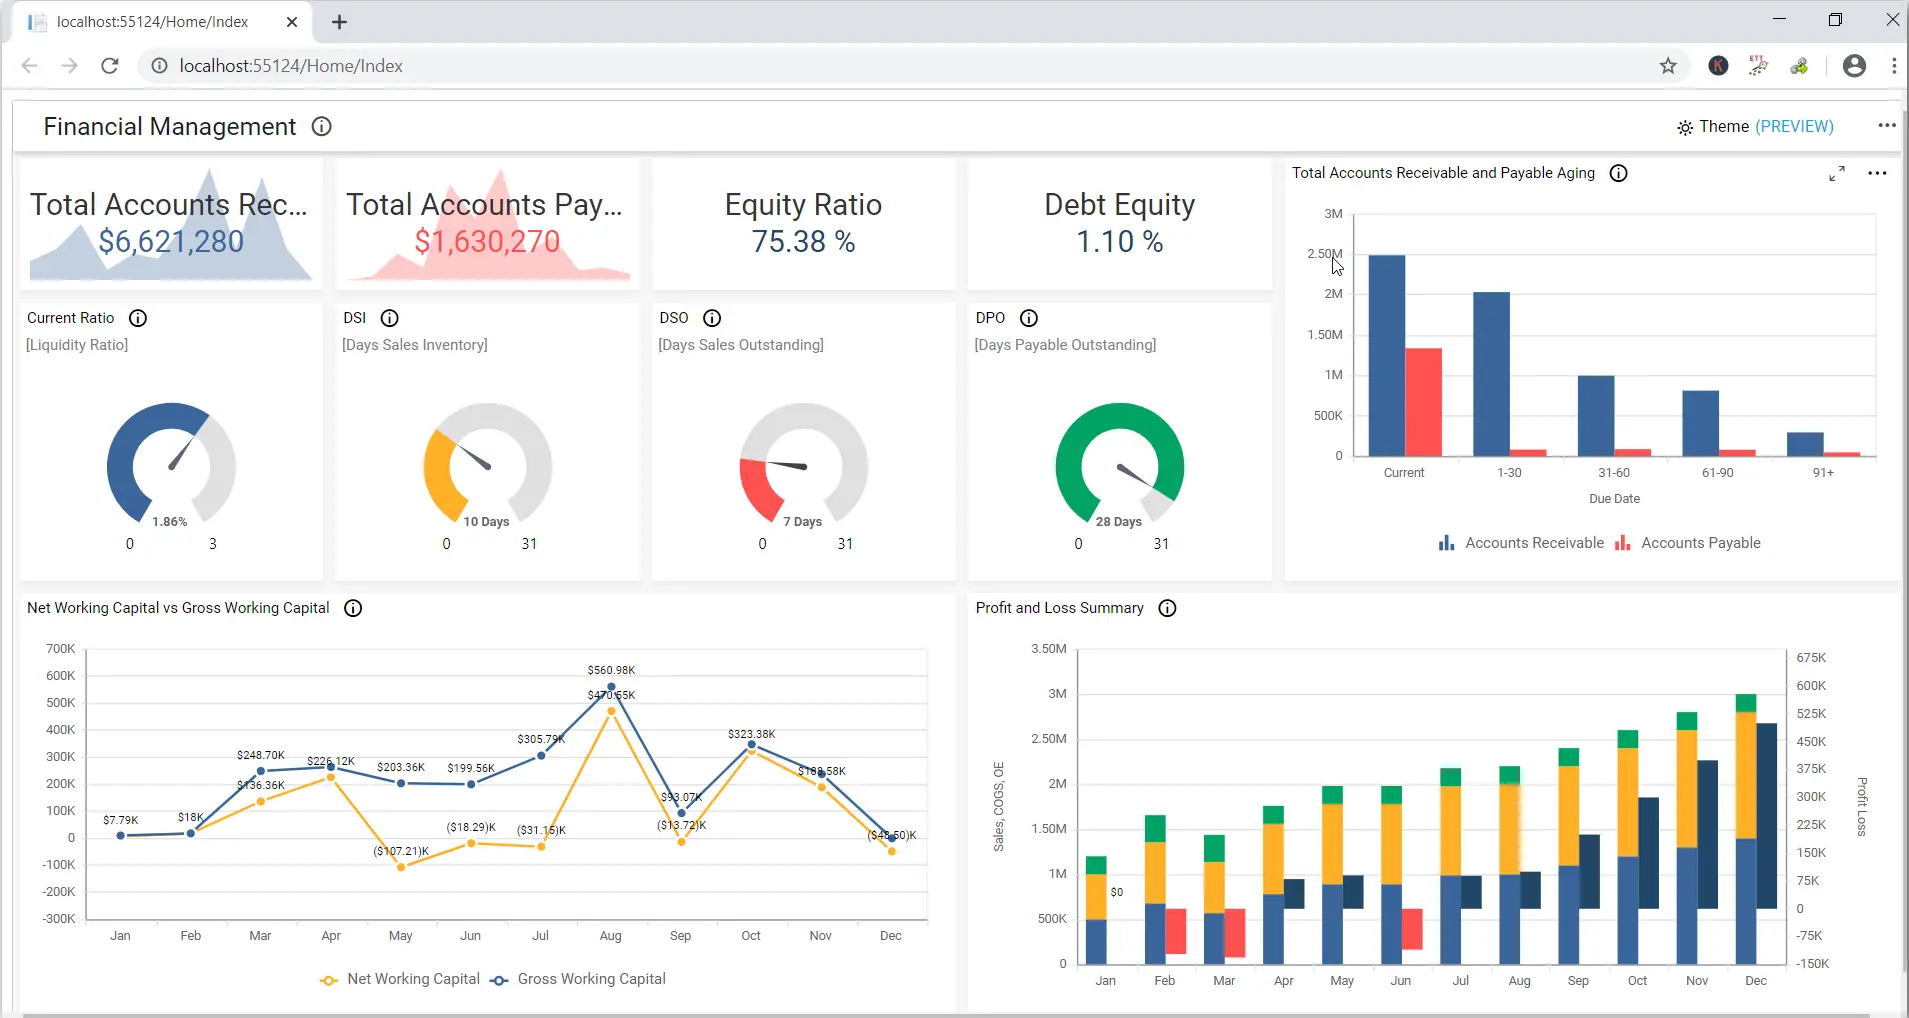

Financial Management Dashboard Embedded into ASP.NET MVC Application
- Using Microsoft Visual Studio, create a new ASP.NET MVC project (File > New > Project), as shown.
We’ve discussed how to integrate dashboards with the embed SDK for ASP.NET MVC applications. You can get the sample code from our documentation.
Now, let’s see how to integrate dashboards with the embed SDK into ASP.NET Core applications.
Integrating dashboards into ASP.NET Core applications
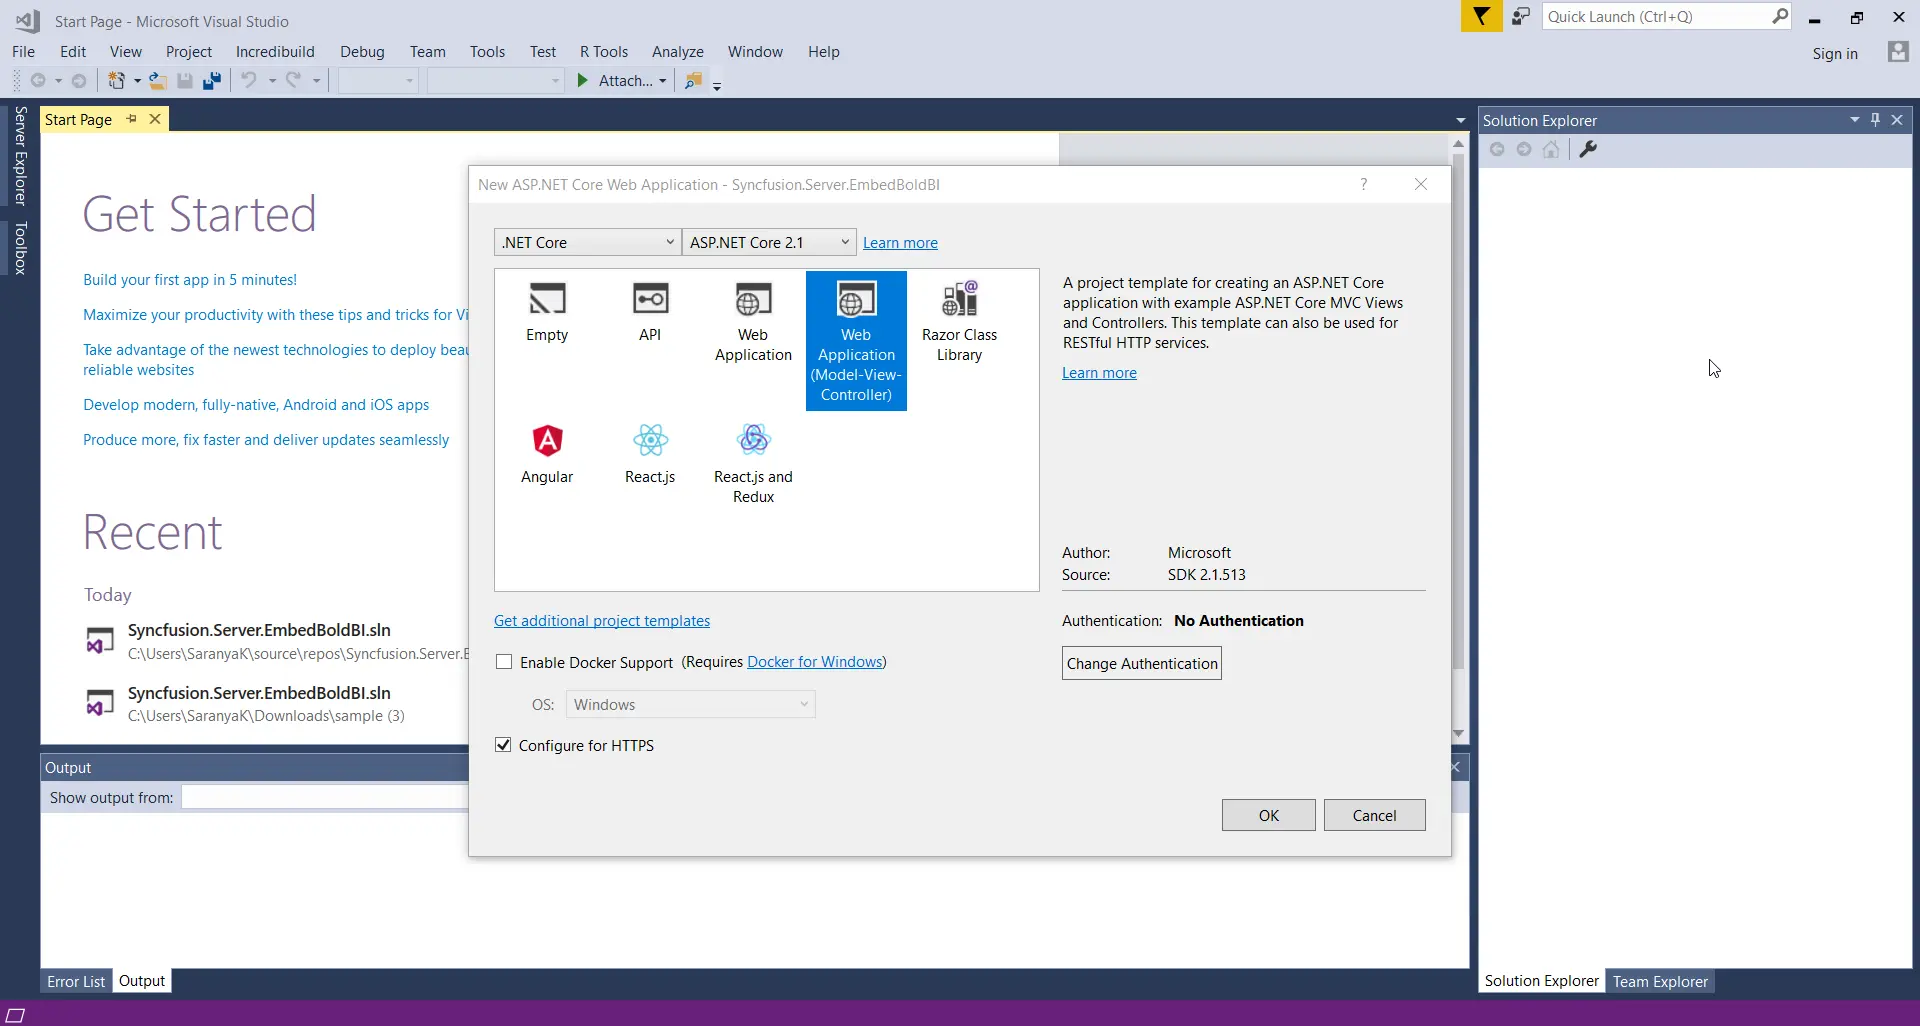
- Using Microsoft Visual Studio, create a new ASP.NET Core project (File > New > Project), as shown.

Create New ASP.NET Core Application Choose the Web Application (Model-View-Controller) template from the project template window.
Choose Template from Project Template Window - Create a Model class called EmbedProperties under Models and provide the dashboard RootUrl, SiteIdentifier, Environment, UserEmail, and EmbedSecret.
using System;
using System.Collections.Generic;
using System.Linq;
using System.Web;
namespace Syncfusion.Server.EmbedBoldBI.Models
{
public class EmbedProperties
{
public static string RootUrl = "http://localhost:5000/bi/";
public static string SiteIdentifier = "site/site1";
//Enter your BoldBI credentials here.
public static string UserEmail = "Your User Email";
// Get the embedSecret key from Bold BI.
public static string EmbedSecret = "Your Embed Secret";
}
}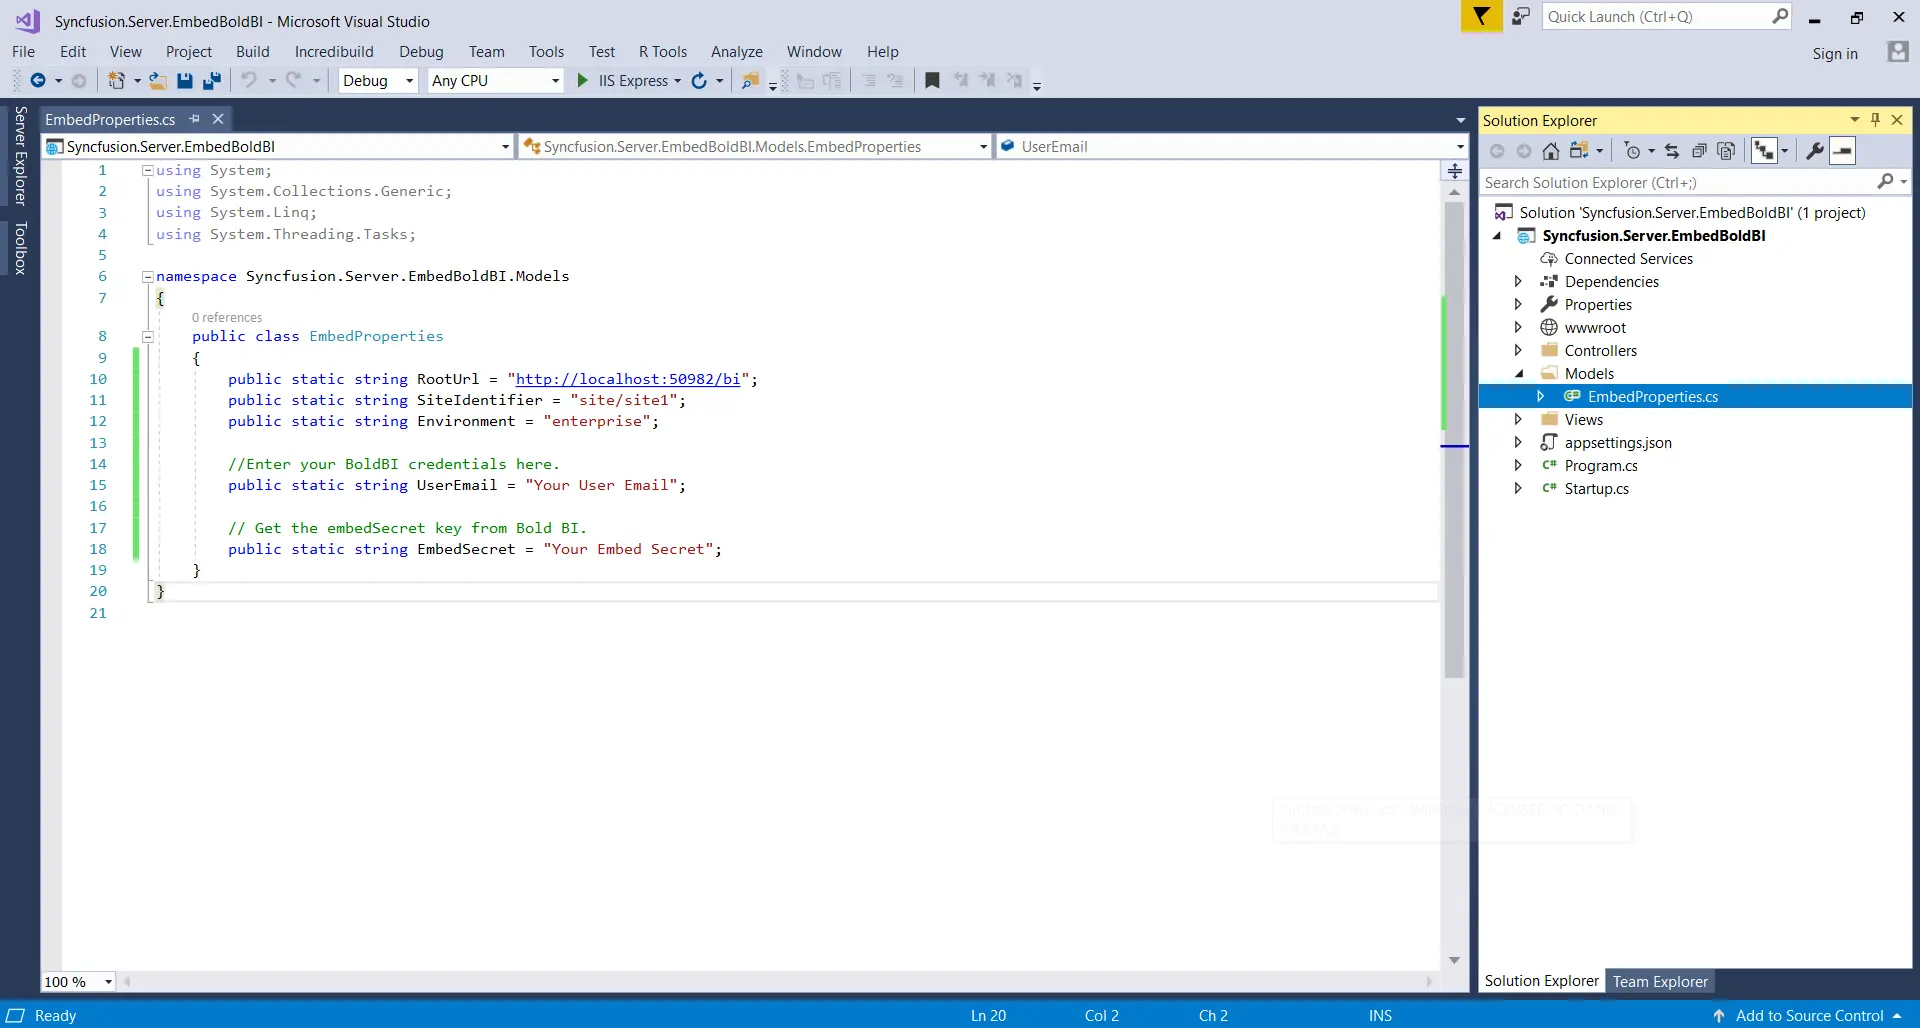
Create EmbedProperties class under Model Note: To learn about the properties defined in the EmbedProperties class, refer to the previous table found in the ASP.NET MVC section of this post.
Create a Model class called EmbedClass under Models and declare the properties, as shown.
using System;
using System.Collections.Generic;
using System.Linq;
using System.Web;
namespace Syncfusion.Server.EmbedBoldBI.Models
{
[DataContract]
public class EmbedClass
{
[DataMember]
public string embedQuerString {get; set; }

[DataMember]
public string dashboardServerApiUrl {get; set; }
}
}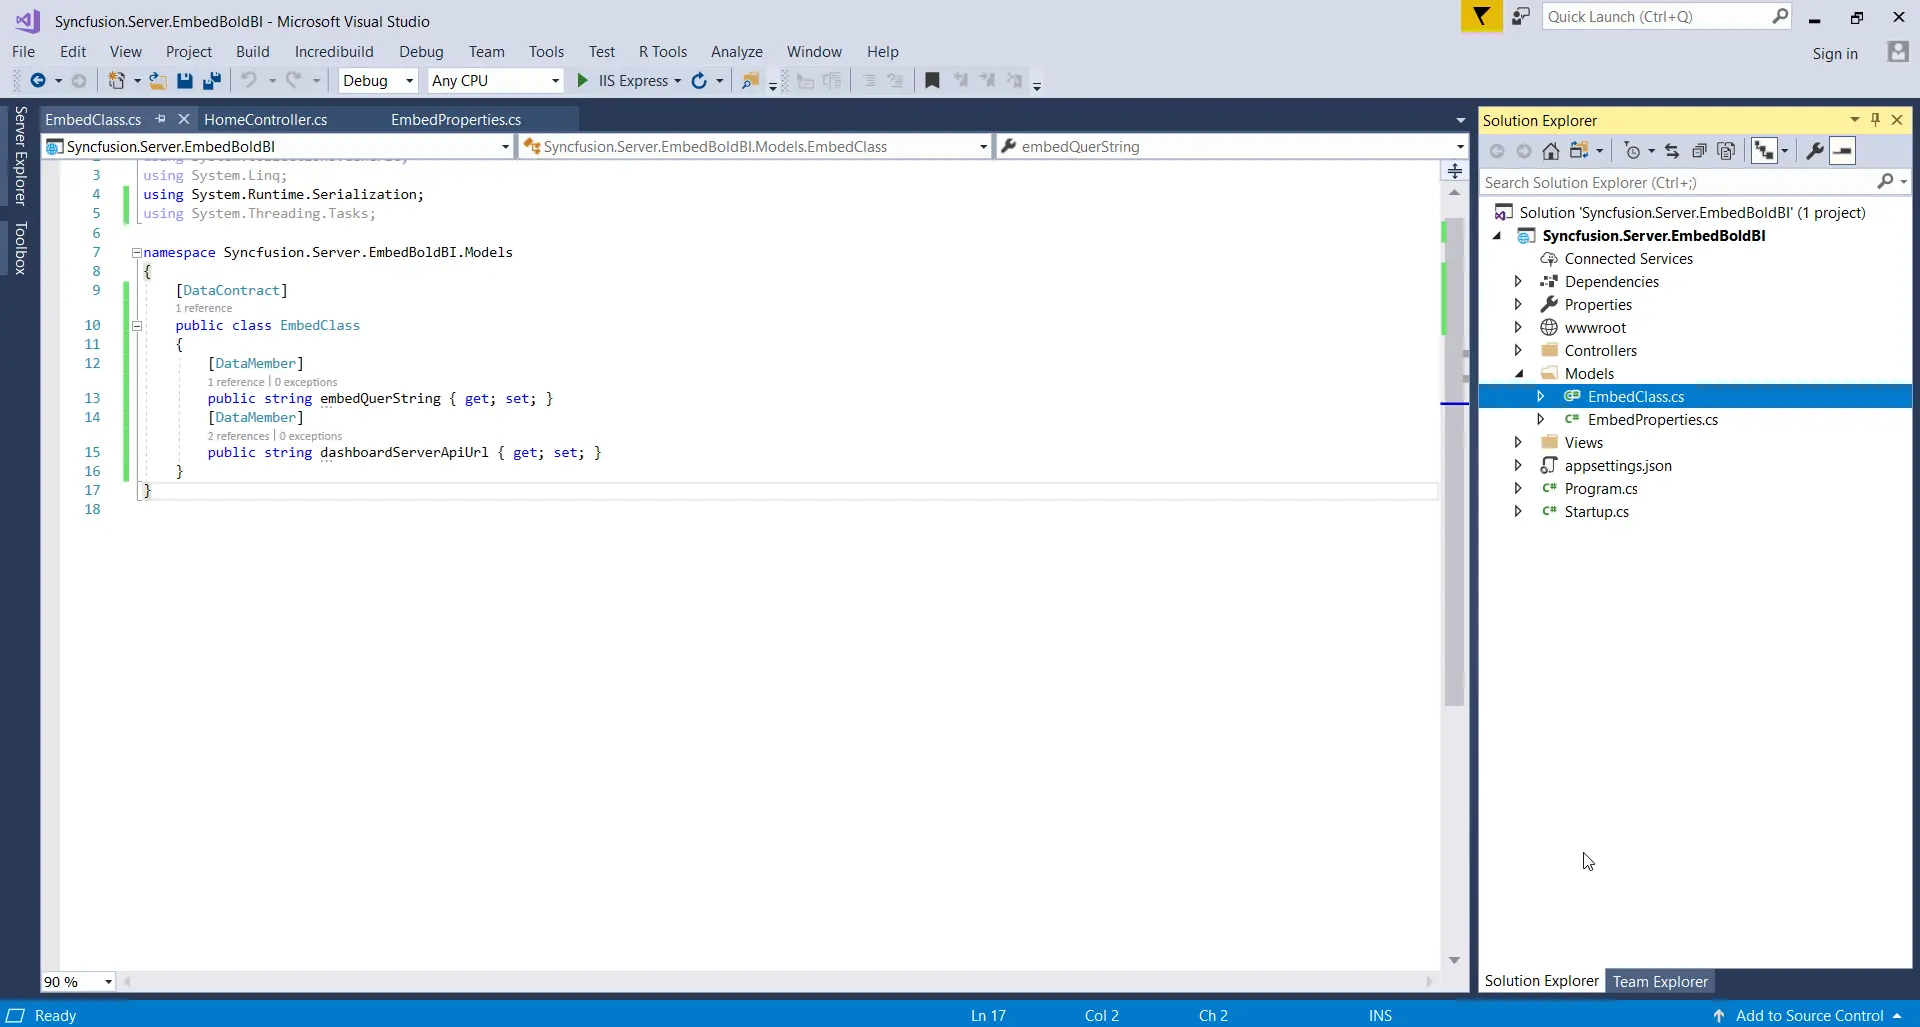

Create EmbedClass Model Class under Models - Add code to create the authorization server in the HomeController by sending an email and embed signature to the Bold BI Server for validating the embed details.
[HttpPost]
        [Route("AuthorizationServer")]
        public string AuthorizationServer([FromBody] object embedQuerString)
        {
            var embedClass = Newtonsoft.Json.JsonConvert.DeserializeObject(embedQuerString.ToString());

            var embedQuery = embedClass.embedQuerString;
            // User your user-email as embed_user_email
            embedQuery += "&embed_user_email=" + GlobalAppSettings.EmbedDetails.UserEmail;
			//To set embed_server_timestamp to overcome the EmbedCodeValidation failing while different timezone using at client application.
            double timeStamp = (int)DateTime.UtcNow.Subtract(new DateTime(1970, 1, 1)).TotalSeconds;
            embedQuery += "&embed_server_timestamp=" + timeStamp;
            var embedDetailsUrl = "/embed/authorize?" + embedQuery + "&embed_signature=" + GetSignatureUrl(embedQuery);

            using (var client = new HttpClient())
            {
                client.BaseAddress = new Uri(embedClass.dashboardServerApiUrl);
                client.DefaultRequestHeaders.Accept.Clear();

                var result = client.GetAsync(embedClass.dashboardServerApiUrl + embedDetailsUrl).Result;
                string resultContent = result.Content.ReadAsStringAsync().Result;
                return resultContent;
            }

        }

        public string GetSignatureUrl(string queryString)
        {
            if (queryString != null)
            {
                var encoding = new System.Text.UTF8Encoding();
                var keyBytes = encoding.GetBytes(GlobalAppSettings.EmbedDetails.EmbedSecret);
                var messageBytes = encoding.GetBytes(queryString);
                using (var hmacsha1 = new HMACSHA256(keyBytes))
                {
                    var hashMessage = hmacsha1.ComputeHash(messageBytes);
                    return Convert.ToBase64String(hashMessage);
                }
            }
            return string.Empty;
        }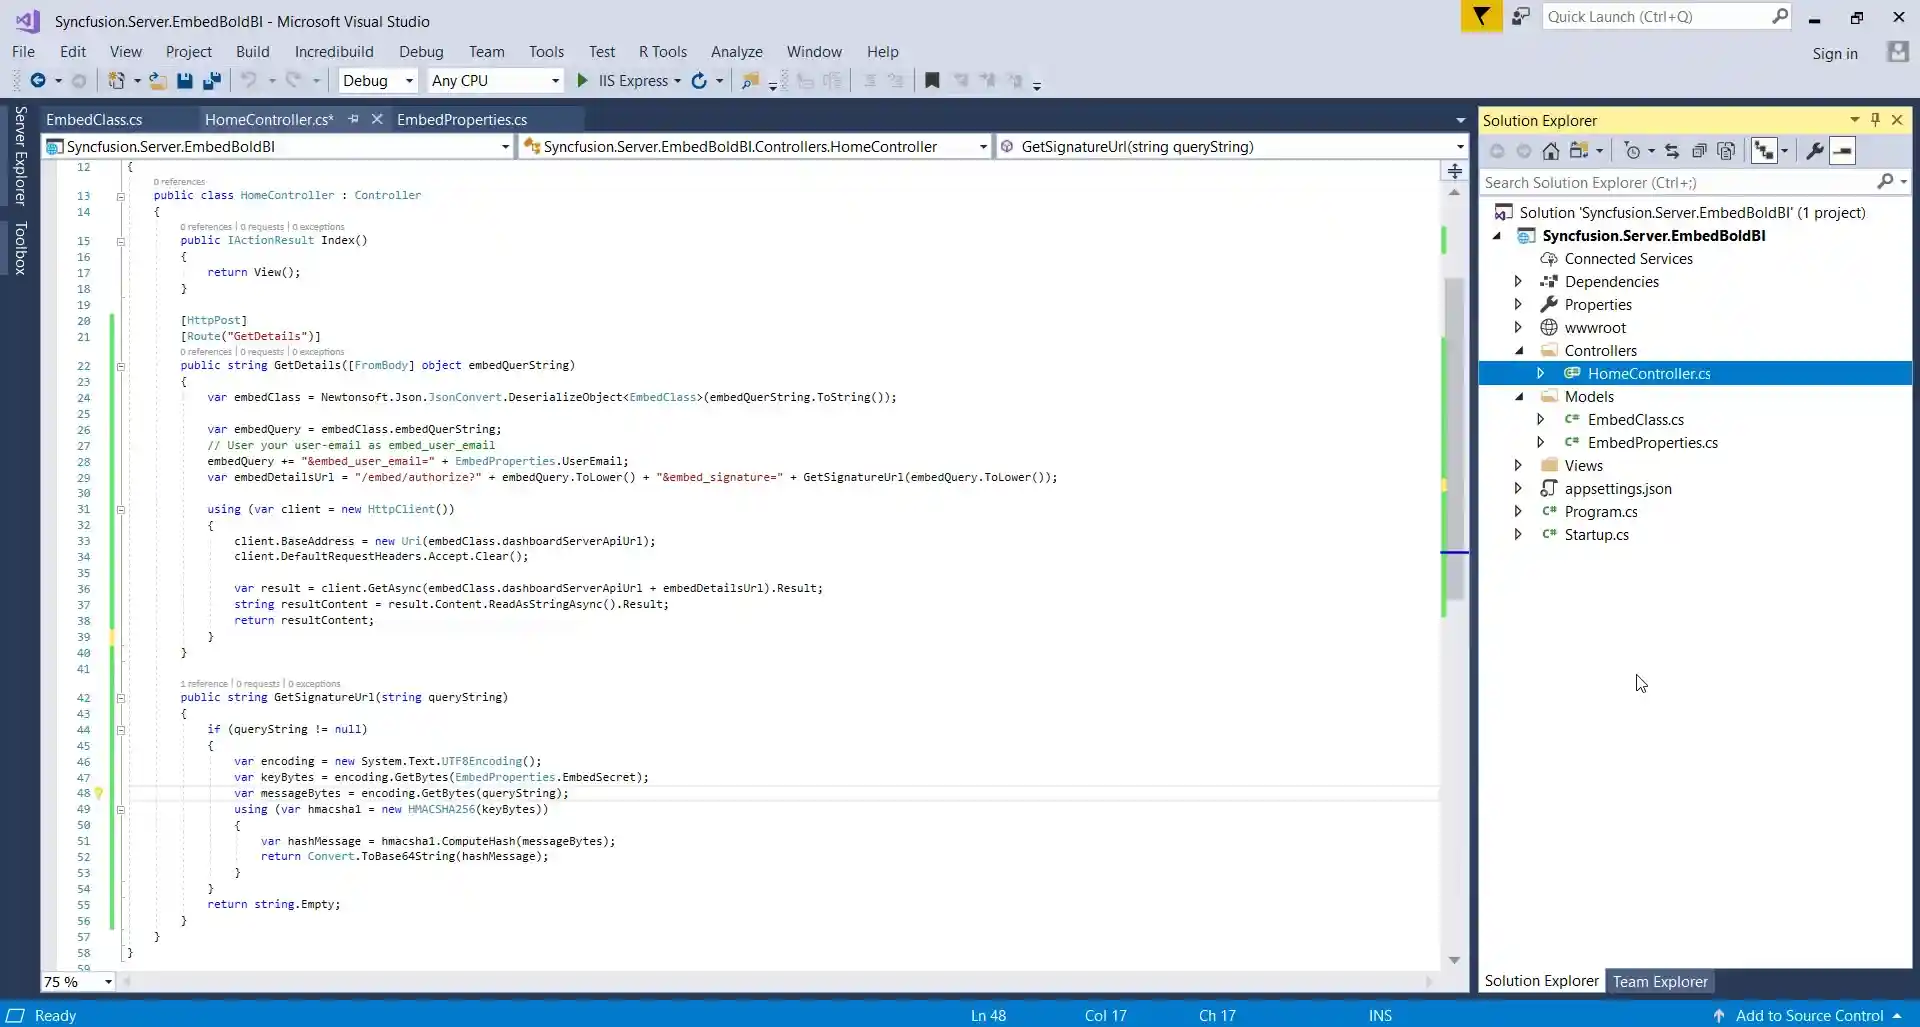
Create Authorization Server in Controller - Create an Index.js file under the wwwroot folder and add the renderDashboard function to define the Bold BI instance to load the dashboard. EmbedProperties.cs is already defined under the Models folder. You can retrieve dashboardId via the dashboard URL. In the following URL example, the bolded text indicates the dashboard ID:
https://localhost:50982/bi/en-us/site/site1/dashboards/e89891d5-af12-4c8b-99c0-887b0ce122eb/Finance/Financial%20Management?showmydashboards=1
Finally, embedContainerID is set as dashboard, which is declared in HTML in a <div> tag.
function renderDashboard() {
    this.dashboard = BoldBI.create((
    serverUrl = rootUrl + “/” + siteIdentifier,
    dashboardId: “015e1ce3-2a6a-4fac-ab1e-59b3243d565a”,
    embedContainderId: “dashboard”,
    width: “100%”,
    height: “100%”,
    authorizationServer: {
    url: authorizationServerUrl
    },
    });
    console.log(this.dashboard);
    this.dashboard.loadDashboard();
};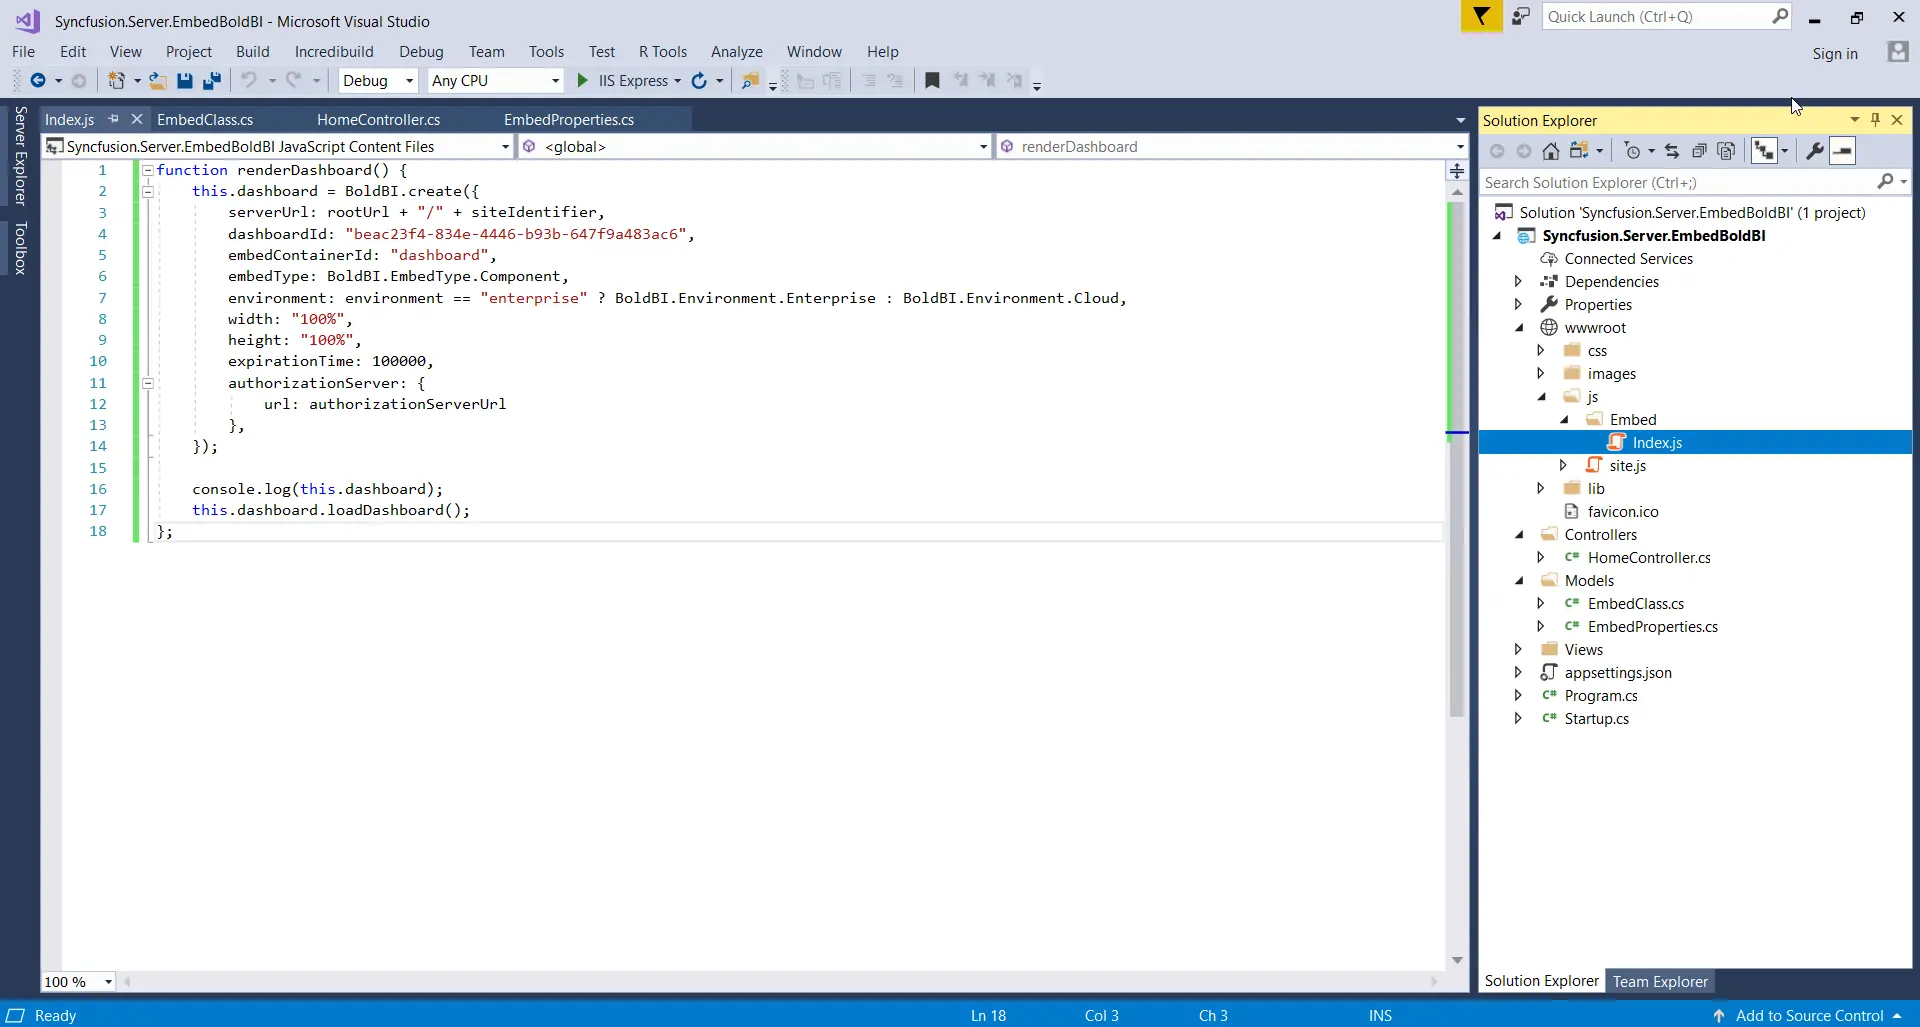
Create Index.js file and Define Bold BI Embedding Instance Note: Instead of the dashboardId property, you can use dashboardPath to create the Bold BI instance. The value should be in the format /{Category}/{DashboardName}.
- Create an Index.cshtml file under Views. Refer to the required scripts and create body content with the embedContainerId as dashboard.
@using Syncfusion.Server.EmbedBoldBI.Models;
@{
viewBag.title = “Home”;
Layout = null;
}
<!DOCTYPE html>
<html>
<head>
<link rel="stylesheet" href="https://fonts.googleapis.com/css?family=Roboto:400,700" />
<link rel="stylesheet" href="./assets/css/site.css" />
<script type="text/javascript" src="https://cdnjs.cloudflare.com/ajax/libs/jquery/1.10.2/jquery.min.js"></script>
<script type="text/javascript" src="https://cdnjs.cloudflare.com/ajax/libs/jquery-easing/1.3/jquery.easing.min.js"></script>
<script type="text/javascript" src="https://cdnjs.cloudflare.com/ajax/libs/jsrender/1.0.5/jsrender.min.js></script>
<script type="text/javascript" src="https://cdn.boldbi.com/embedded-sdk/v3.3.40/embed-js.js"></script>
<script type="text/javascript" src="./Embed/Index.js”></script>
var rootUrl = “@EmbedProperties.RootUrl”;
var siteIdentifier = “@EmbedProperties.SiteIdentifier”;
var authorizationServerUrl= “@url.Action(“GetEmbedDetails”, “Home”)”;
</script>
</head>
<body onload="renderDashboard(dashboardId)" style=”width:100%; height: 100%”>
        <div id="dashboard" ></div>
</body>
</html>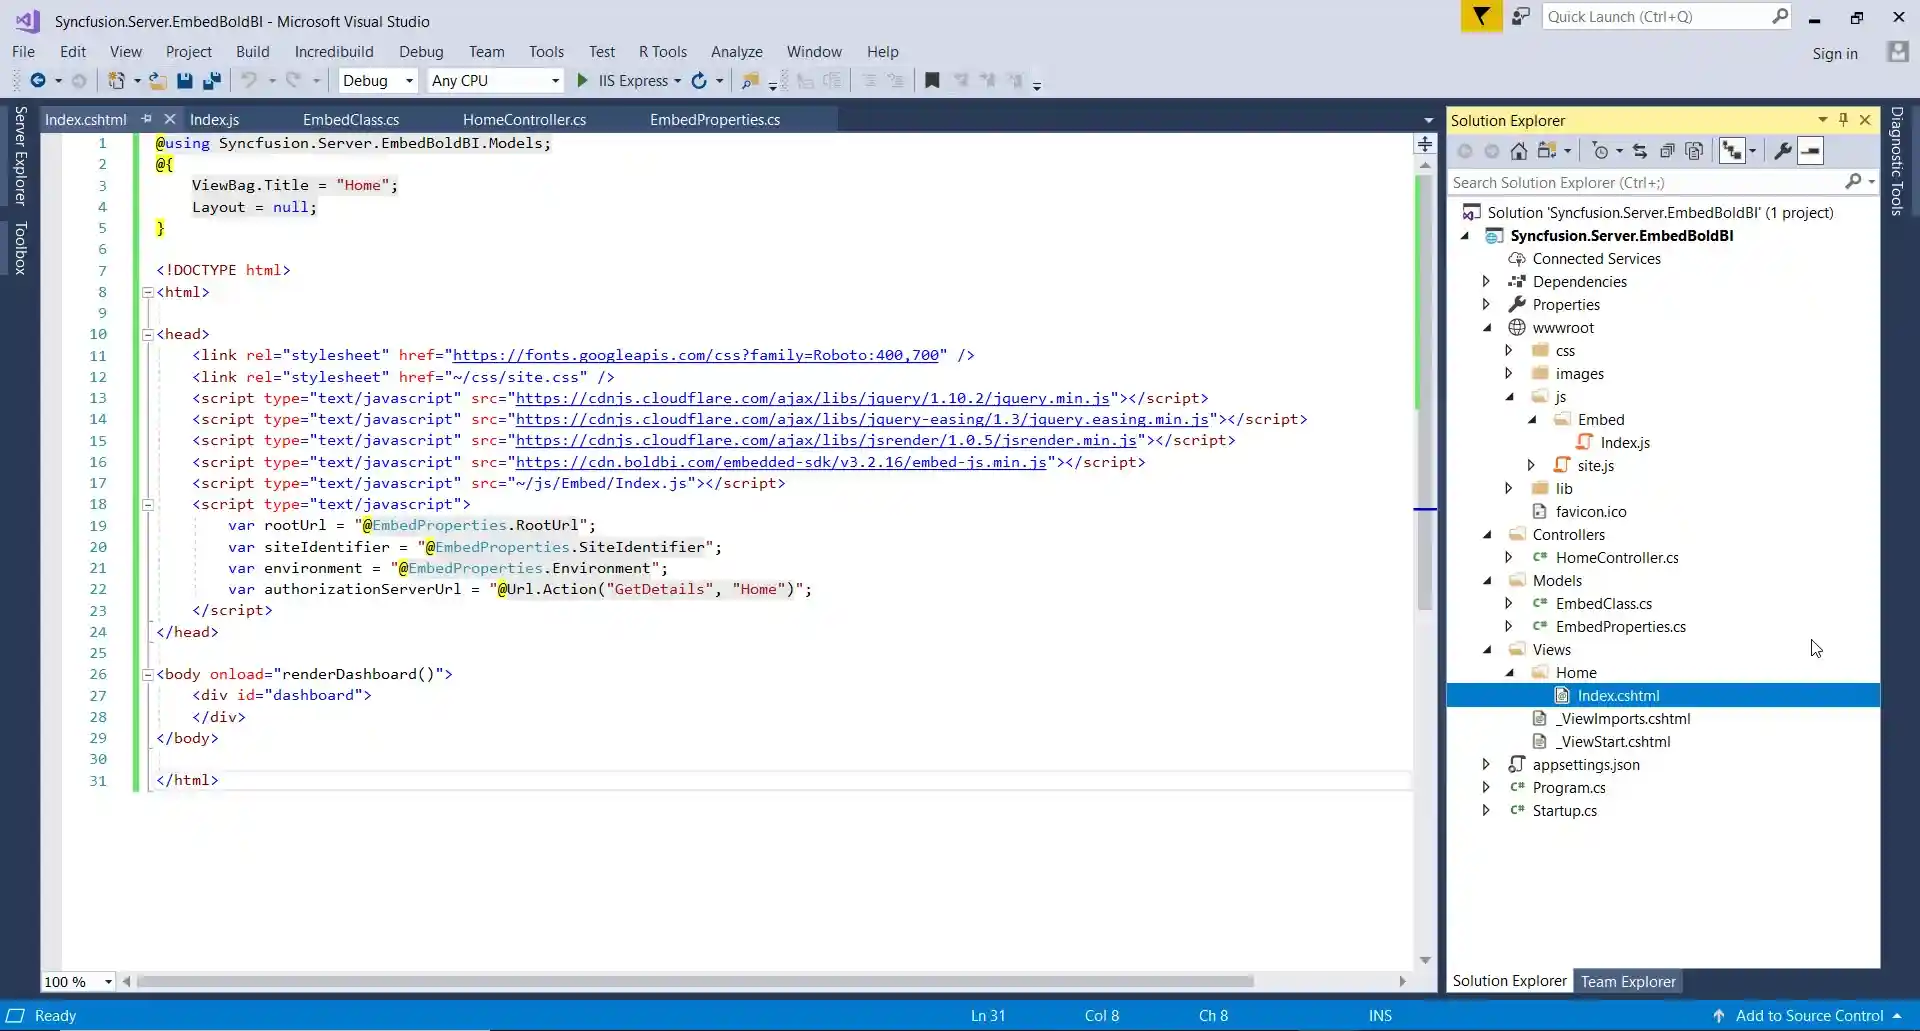

Create Index.cshtml View File and Add HTML Code to Load the Dashboard - Finally, run the ASP.NET Core application to see the embedded dashboard in the browser.
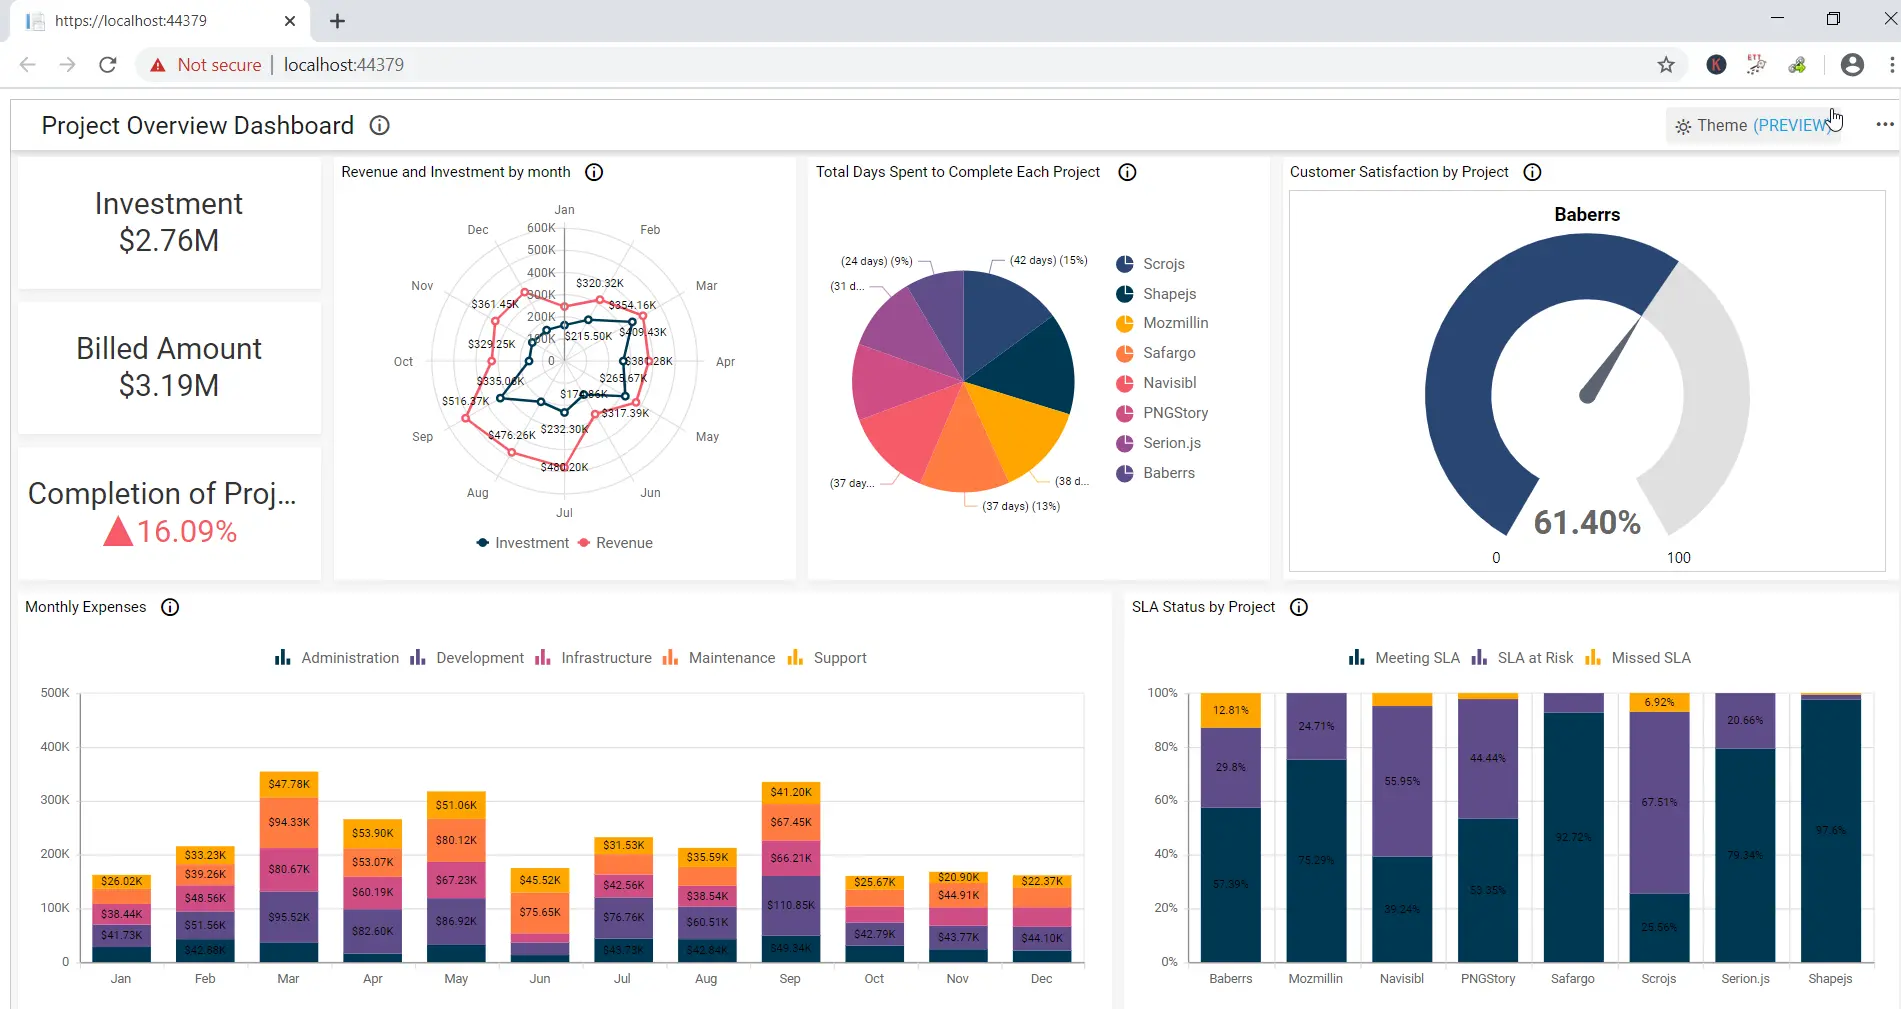

Project Overview Dashboard Embedded in ASP.NET Core Application
- Using Microsoft Visual Studio, create a new ASP.NET Core project (File > New > Project), as shown.
You can get the code for this ASP.NET Core sample from our documentation.
Conclusion
I hope this article helps you integrate Bold BI® dashboards into ASP.NET MVC and ASP.NET Core applications using the embed SDK. You can also integrate dashboards into Angular with ASP.NET Core applications (refer to our documentation).
If you have any questions on this blog, please feel free to post them in the following comment section. Get started with Bold BI by signing up for a free trial and create more interactive business intelligence dashboards. You can also contact us by submitting your questions through the Bold BI website or, if you already have an account, you can log in to submit your support question.


